Installing the Voyager 2110 - Mac OS 9.x
Before installing your Voyager 2110 Wireless Router, please see the document Getting Started with the Voyager 2110 Wireless Router
1. To connect your computer to the Voyager 2110 Router using a cable:
- Attach one end of the yellow Ethernet cable to one of the Network sockets at the back of the router.
- Connect the other end of the cable to the Ethernet/Network Interface Card (NIC) socket of the computer.
If the computer cannot find the router, leave for a few minutes and try again. If this does not solve the problem, restart the computer with the router plugged in and try again.
2. Configuring your Network Settings.
Click on the Apple icon in the top left hand corner of the screen.
From the menu select Control Panels and then TCP/IP.
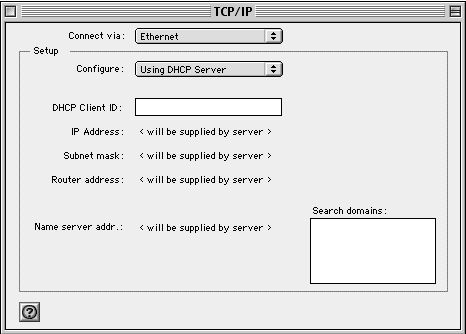
3. The TCP/IP window opens.
- Click on the drop down menu Connect Via:
- Select Built-in Ethernet
- Select Using DHCP Server from the Configure: drop down menu.
- Close the window.
- Click Save
- Restart your computer. Configuration is now finished.
4. Your Voyager 2110 Router is pre-configured for UK Consumer Broadband services using NAT and Dynamic IP address allocation (PPPoA and VC MUX). The only settings you need to configure into your Voyager 2110 are the Broadband User Name and Password provided by us.
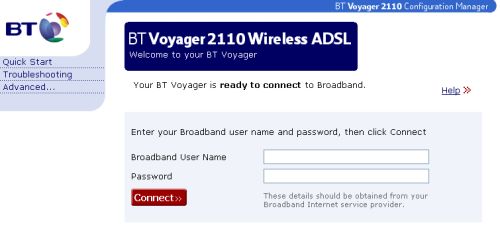
5. To set or update your Broadband connection settings, open your web browser and type http://192.168.1.1 into the URL address box. Then press the Enter or Return key.
The Configuration Manager opens at the Quick Start page.
6. If a dial-up screen appears when trying to connect to the Internet, you will need to follow these steps to set-up your browser to stop dialling a connection.
- From the Apple menu, select Control Panels, then Remote Access.
- Click the Options... button.
- Select the Protocol tab.
- In Use Protocol select PPP.
- Deselect the option, Connect automatically when starting TCP/IP applications.
- Click OK.
Close the window and save the settings.
7. If the Quick Start page does not open after installation, make sure that your computer is set to obtain an IP address automatically as follows. If it is set correctly, restart your computer then try again.
- From the Apple menu, select Control Panels, then TCP/IP.
- In the Connect via drop down menu, select Ethernet Slot 0 if you are using a USB connection, or built-in Ethernet if you are using an Ethernet connection.
- In the Configure drop down menu, select Using DHCP.
- Close the window and save your changes.
- Restart your computer.
8. Make sure that your Broadband service is ready by checking that the DSL light is ON and steady.
9. Click Connect. The Voyager 2110 will now connect you to our Internet service and the Quick Start screen will change to show the connection status. If at any time you wish to disconnect from your Internet service, simply click the Disconnect button.
If you cannot browse the Internet, click Disconnect, then follow steps above again.
With your Voyager 2110 Router, your broadband connection is always-on and you do not have to dial-up to initiate the connection. Simply start your Internet browser and surf the Internet. That's it!

10. Once you have verified that your broadband Internet connection works correctly, we suggest that you also review the following security documents:
- Wireless Security for the Voyager 2110 Wireless Router
- Internet Security for the Voyager 2110 Wireless Router
Has this page helped you solve your problem? Your feedback helps us to improve the help we provide.
Rate this page : 


Please note: We cannot reply to individual feedback through Rate My Page. If you need more help with a problem please use Contact Us.


